Have you ever dreamed of growing your own vegetables at home—without dealing with messy soil or constant garden maintenance? Deep Water Culture (DWC) might be the perfect starting point for you. This simple and effective hydroponic system allows you to grow fresh, healthy vegetables indoors, no garden or yard required.
In this comprehensive guide, you’ll learn exactly how to build your own DWC system at home, what materials you’ll need, and which plants are easiest to grow for beginners. Whether you live in a small apartment or a large house, you’ll see that growing food hydroponically is much easier than it seems.
What Is Deep Water Culture (DWC)?
Deep Water Culture is one of the simplest types of hydroponic growing systems. It works by suspending the roots of plants in a nutrient-rich water solution. An air pump and air stone continuously oxygenate the water, ensuring the roots receive both nutrients and oxygen at the same time.
This constant access to both water and oxygen promotes faster growth, healthier plants, and higher yields—without the need for soil.
Benefits of DWC for Home Growers
-Soil-free and mess-free: Perfect for indoor growing without the dirt.
-Low maintenance: Once set up, it requires minimal daily care.
-Fast plant growth: Constant access to water and nutrients accelerates plant development.
-Space-saving: Ideal for small homes, balconies, or even kitchen counters.
-Affordable to build: Uses simple, inexpensive materials you can easily find online or at home improvement stores.
Materials You’ll Need to Build a DIY DWC System at Home
Here’s a list of essential items to start your hydroponic journey:
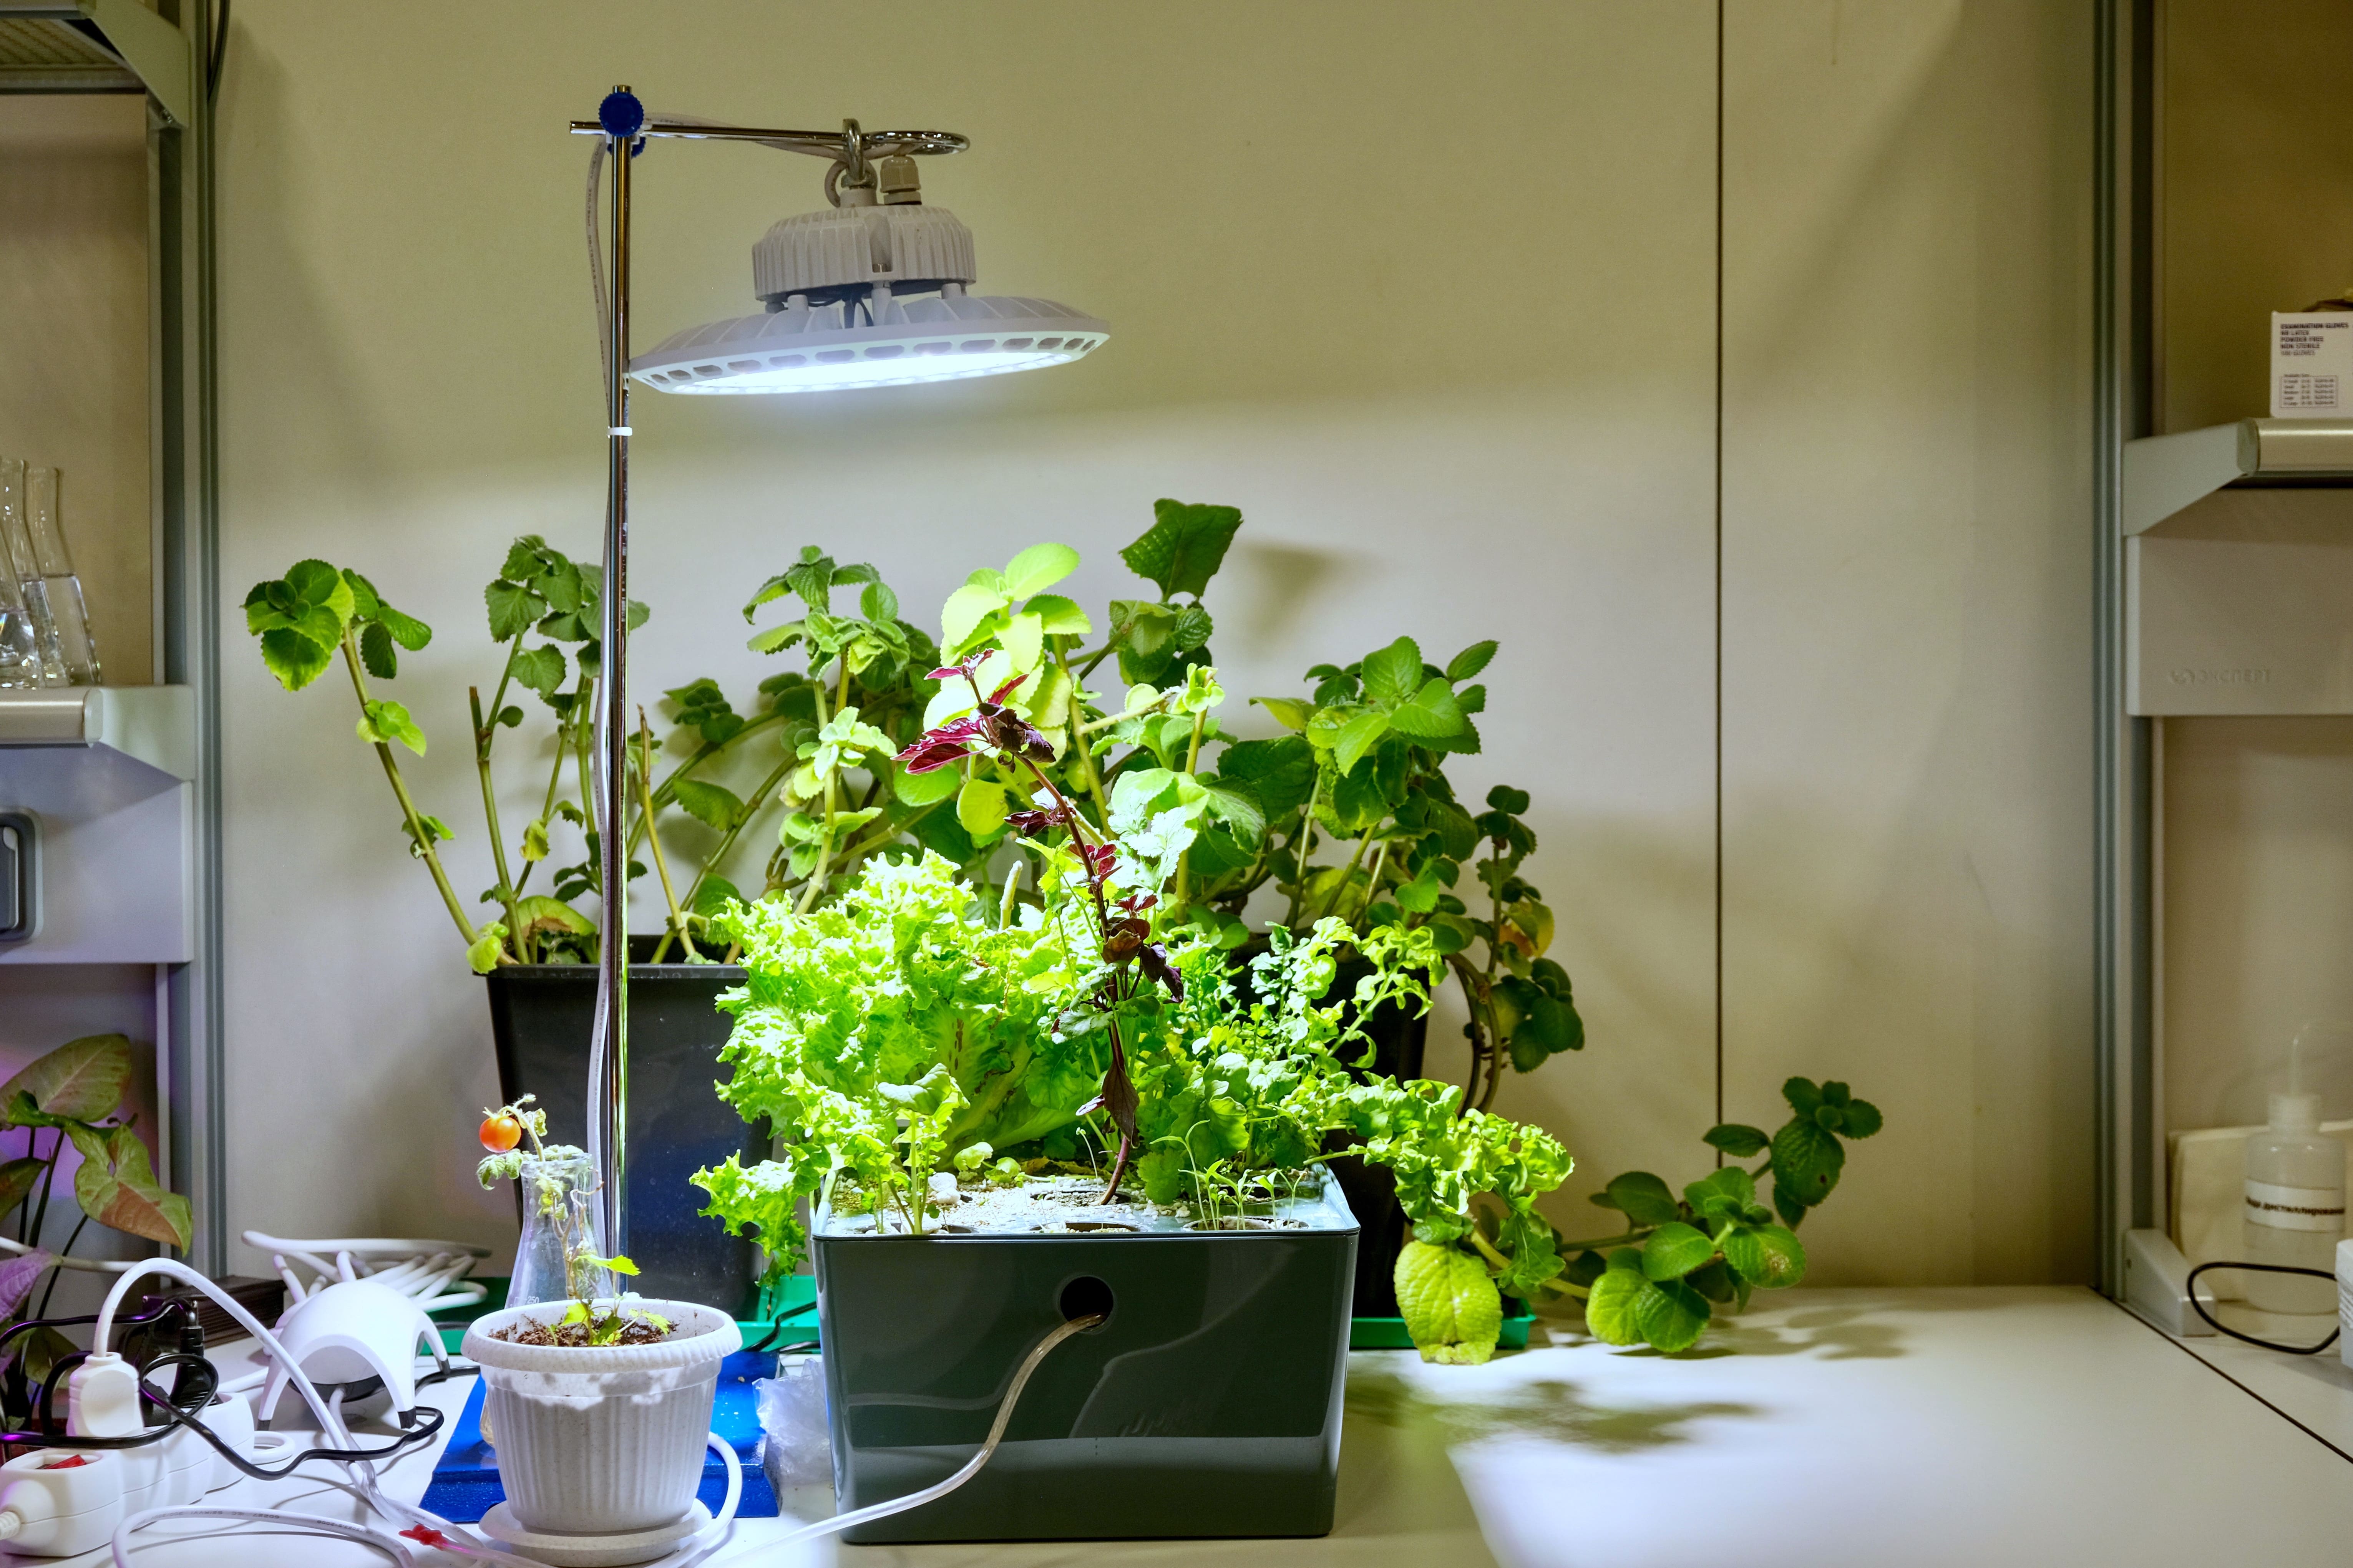
-Opaque plastic storage bin with lid (20–30 liters): Must block out light to prevent algae growth.
-Net pots (small plant baskets): To hold the plants and growing medium.
-Hydroponic sponge or rockwool cubes: To support seedlings in the net pots.
-Aquarium air pump and air stone: To provide oxygen to the roots.
-Flexible tubing: To connect the air stone to the pump.
-Hydroponic nutrient solution: Specifically formulated for soilless growing.
-pH meter and pH down solution: To monitor and adjust water acidity.
-LED grow light (if sunlight is limited): For providing artificial lighting.
-Optional but helpful: A thermometer to monitor water temperature, ideally between 18–24°C (64–75°F).
Step-by-Step Instructions: How to Set Up Your Deep Water Culture System
1. Choose and Prepare Your Container
Select a sturdy, opaque plastic storage bin with a tightly fitting lid. Opaque containers help block light, which is crucial to prevent algae from growing in the nutrient solution. Drill or cut holes in the lid large enough to hold your net pots.
💡 Tip: Spacing the holes about 10–15 cm apart works well for leafy greens.
2. Install the Air Stone and Air Pump
Place the air stone at the bottom of the container. Connect it to the aquarium air pump using the flexible tubing. The air pump should be kept outside the container and above water level to avoid water backflow.
Once turned on, the air stone will release bubbles, oxygenating the water and preventing root rot.
3. Add Water and Nutrient Solution
Fill the container about two-thirds full with clean, room-temperature water. Then, add the hydroponic nutrients according to the manufacturer’s instructions. Make sure the solution contains essential macro and micronutrients like nitrogen (N), phosphorus (P), potassium (K), calcium, magnesium, and trace minerals.
4. Adjust the pH Level
Use a pH meter to test the solution. For most vegetables, the ideal pH range is between 5.5 and 6.5. If your water is too alkaline, add a few drops of pH down solution and test again until it’s within range.
🌱 Why is pH important? If the pH is too high or low, your plants may not be able to absorb nutrients properly.
5. Place Your Seedlings
Germinate your seeds separately (e.g., in wet paper towels or seedling trays) until they develop roots. Then place the seedlings into hydroponic sponges or rockwool, and insert them into the net pots.
Make sure the bottom of the root zone just touches the surface of the water in your container. As roots grow, they’ll naturally extend into the solution.
6. Provide Adequate Lighting
Most edible plants need 12–16 hours of light per day to thrive. If you don’t get enough natural sunlight, position an LED grow light about 20–30 cm above the plants. Choose full-spectrum lights that mimic natural sunlight.
💡 Grow tip: Avoid placing the system near heating vents or cold windows. Sudden temperature changes can stress your plants.
7. Turn on the Air Pump and Monitor Daily
Keep the air pump running 24/7. Check that bubbles are constantly forming in the water. This is a sign that your roots are getting sufficient oxygen. Without this, your plants can quickly develop root rot.
Also check the water level, pH, and temperature regularly. Top up with water as needed.
Best Plants to Grow in Deep Water Culture Systems
If you're just getting started, choose plants that are easy to grow and have shallow roots. These varieties thrive in DWC systems and offer quick, satisfying results:
-Lettuce: Fast-growing and perfect for DWC beginners.
-Basil: Grows lush and aromatic in hydroponic setups.
-Mint: Thrives with little effort and provides endless flavor.
-Arugula: Spicy greens that germinate quickly.
-Dill: Grows well in controlled conditions.
-Parsley: Compact, leafy, and high in nutrients.
🪴 Avoid large or deep-rooting plants like tomatoes or cucumbers when starting out—they require more space, structural support, and advanced system design.
Common Mistakes to Avoid (and How to Fix Them)
Even simple systems can go wrong if you overlook these important points:
-Using a transparent container: This leads to algae growth. Always choose opaque containers.
-Not running the air pump continuously: Roots can suffocate. Run it 24/7.
-Skipping pH checks: Nutrient lockout occurs when pH is too high or low. Test weekly, or more often if needed.
-Crowding too many plants: Roots will compete for space and oxygen. Start with fewer plants and add more as you gain experience.
-Leaving nutrient solution unchanged for months: Change the water and nutrients every 2–3 weeks for best results.
Maintaining Your DWC System
-Water top-up: As plants consume water, refill with plain water (and adjust pH) to maintain the original volume.
-Nutrient refresh: Every 2–3 weeks, drain and replace the entire nutrient solution.
-Clean equipment: Every month, rinse the bin, air stone, and net pots with mild, non-toxic cleaners to avoid mold or bacterial buildup.
-Monitor plant health: Look out for leaf discoloration, stunted growth, or root issues—these are signs that your system may need adjustments.
Final Thoughts: Home Hydroponics Is Within Your Reach
As you’ve seen, building your own Deep Water Culture system doesn’t require a degree in science or a big budget. With a few basic supplies and a little curiosity, you can start growing healthy, fresh vegetables right in your home.
Not only is it a fun and rewarding hobby, but it’s also a step toward self-sufficiency, sustainability, and better nutrition. Once you taste your first homegrown lettuce or basil, you’ll wonder why you didn’t start sooner.
So why wait? Set up your DWC system today and experience the joy of growing your own food—no soil, no mess, just pure growth.